A really simple project to do on a rainy day (or any time really!). It’s a bit of a cheat to describe this project because I didn’t design or invent anything. Basically, if you can write and you can wash dishes, you can do this craft.
You will need:
- some smooth, plain ceramic items (mug, plate, tile, bowl)
- ceramic and/or glass pens (all of the same fixing type see below)
- your arm muscles
- coffee or your beverage of choice
- something cool to listen to while crafting
- cotton buds (Q-tips)
- scrap paper for blotting the pens
- somewhere safe to store the pieces while they set properly
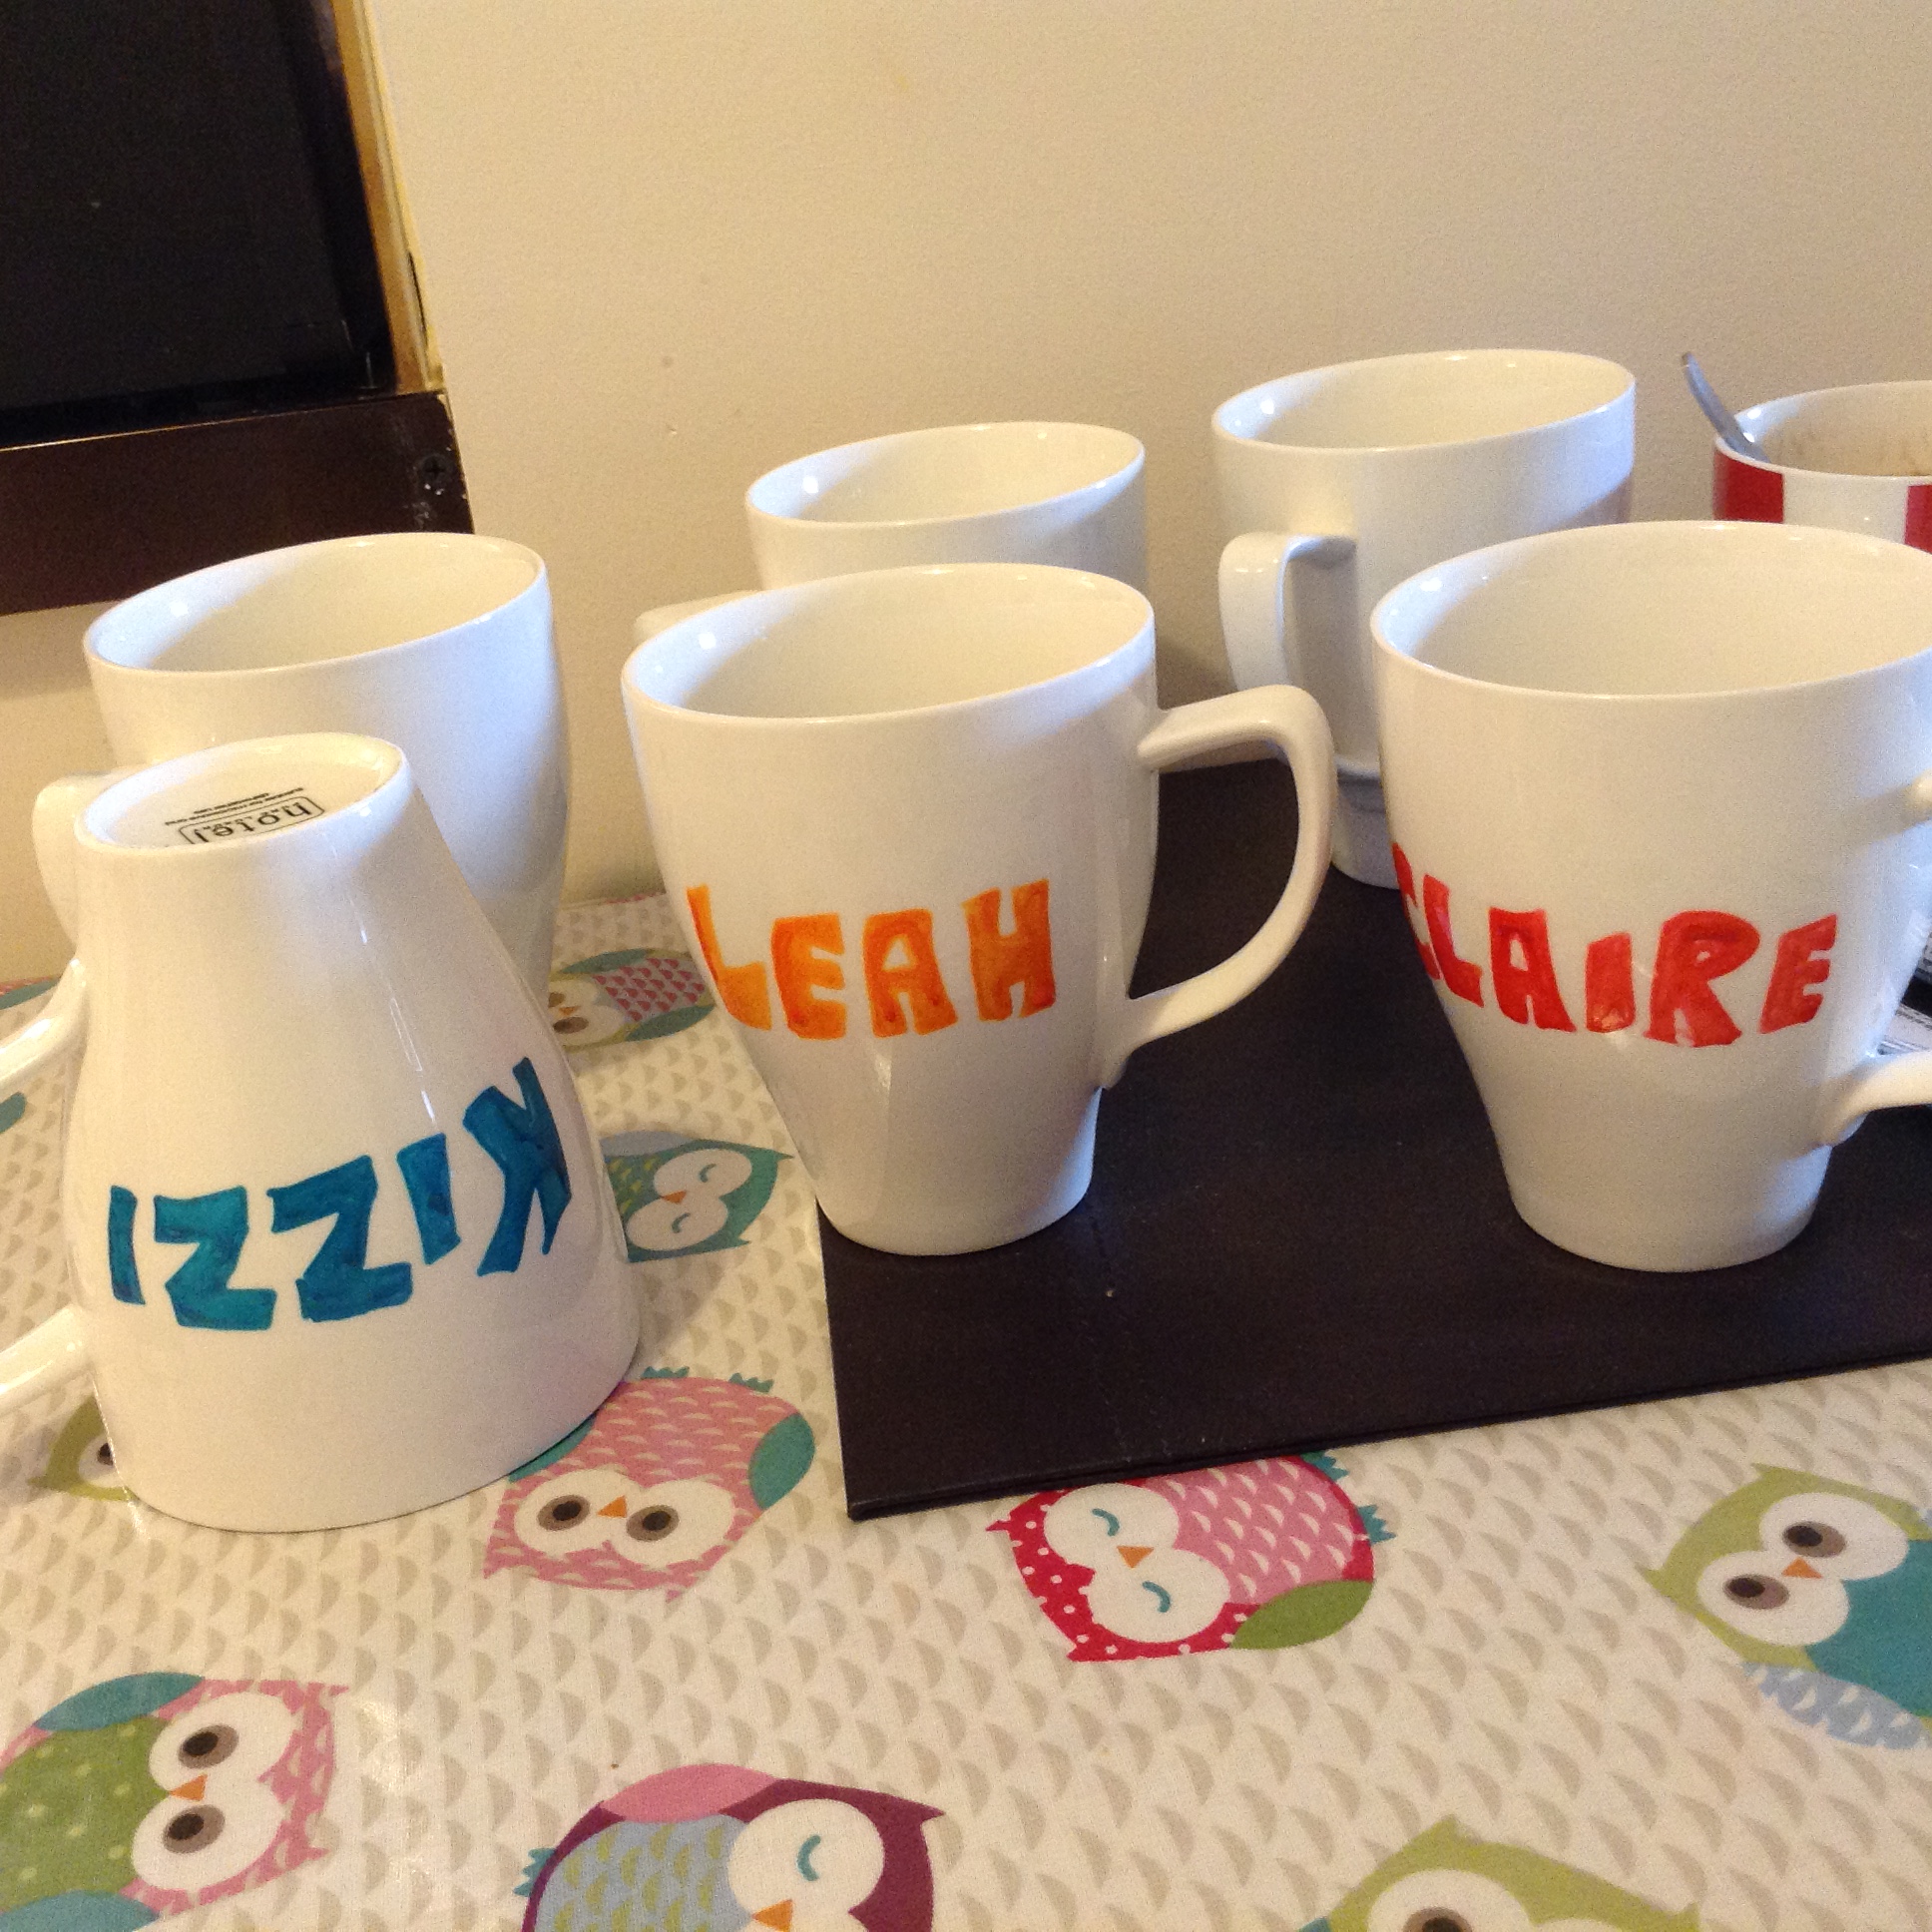
I am doing a really simple design on some mugs. I’m going on holiday next week with my old uni flatmates and since we all live far apart it’s hard to keep up with birthdays and Christmases. So I’m taking them a mug each with their name on it, and everyone else’s names on the back, to make a full set. I’m making one for me too!
FIRST – you need to wash the mug/plate/whatever and make sure it’s totally clean and dry. Try not to touch the area you want to paint with your fingers, because your fingerprints leave an oily residue. The glass pens I bought all say on the side that the surface you want to decorate must be dust and grease-free. There needs to be no barrier to the paint gripping to the ceramic.

The pens I’m using are all designed to just air dry in three days. You can get ones that need oven-baking to fix. The place where I got my pens has them sorted by colour and nib size but not by type of fix, so I had to dig through to find the colours I wanted that were all the same type. I chose to use the ones that don’t need to go in the oven, just for convenience. The important thing is that your whole design is done in the same type of pen.
Now you’re set up with clean ceramics and shiny new glass/ceramic pens, it’s time to choose something to listen to and put the kettle on. Let’s do things in comfort and style, eh? I was drinking coffee and listening to The Infinite Monkey Cage podcasts, but whatever you want is fine. While that’s loading, brewing, etc, you will likely need to shake the pens to get the ink flowing. Sometimes this takes what feels like forever. No need to do weights on ceramic pen day! I had six to do so I was really flagging the end!
The only thing left to do is draw or write your design on the ceramic – being careful not to touch it unnecessarily! I was lucky because with the mugs, I could hold them by wedging my hand inside so I didn’t touch the outer surface. I started with doing block writing for each person’s mug. Everyone is getting a different colour (choosing who got which was the hardest part!) and on the back I wrote everyone else’s names in their colour. You’ll see in the photos.
NOTE: The pen will probably say this on the side in the instructions, but when you have shaken the pen to activate it, you need to take the cap off and blot the nib on paper first, to get the excess out of the way.
Some of the ink was runnier than others – the teal was quite metallic and thick, but the orange and green were more translucent and thin – so be patient and you can use cotton buds to clean your edges if you need to. If you’re super unhappy, you can always immediately wash off the whole lot and start again. I did that with the green, because the letters were too fuzzy the first time I did it. I found, because of the difference in ink, that I had to keep an eye on how they were drying, and keep turning them over to stop all the ink running to the bottom of the letters. I didn’t have any ink run outside the lines – it doesn’t go on that thick!
After a few minutes, the ink will have set enough to leave and then mine took three days to be fixed for washing (or dishwasher). I had enough time to do mine in two stages, with three days between, because there was such a big area of paint on one side I didn’t want to smudge or accidentally smear on the table by trying to do the other side on the same day. So I did the first sides on Tuesday and then the second sides yesterday.
I did mine first, so I could test it was fixed! I re-washed the mugs to make sure that they hadn’t got dusty or greasy while drying (not that our house is a tip, mind!) and to make sure any fingerprints got cleaned off from me moving them about. Then I re-shook the pens, blotted them, and did the lines of text on the back. I did a couple at a time and waited for the runny inks to set a little before adding the next line, but I got all six sets of text done in 40 minutes, including washing.

This is a great craft that is as complicated as you want to make it, and has a lot of possibilities. Personalised crockery is one, but why not potholder tiles; coasters; even a glass table top; champagne flutes etc. Just check your pens first to make sure they’re suited to the surface. And if I were you I’d stick to painting the outsides, just in case it starts to flake off in your food/drinks after repeated use and abuse. Even though they’re meant to be dishwasher safe, I’m going to recommend to my friends that they hand-wash the mugs at first, until they feel brave enough! I don’t have a dishwasher so it’s not an issue for me, but I’d be gutted if the ink flaked or ran because someone’s dishwasher was too brutal for it.
I still have enough time to add a little more to them if I want to, since I don’t need to wrap them for another week. I’ll see how I feel on Monday.
KEY NOTES:
- WASH the ceramic first
- follow the INSTRUCTIONS on the pens
- DON’T TOUCH the ceramic as far as is possible
- GET ARTY
- make sure they DRY FOR THE FULL TIME NEEDED